How to Create a Clay Pot Light Fixture
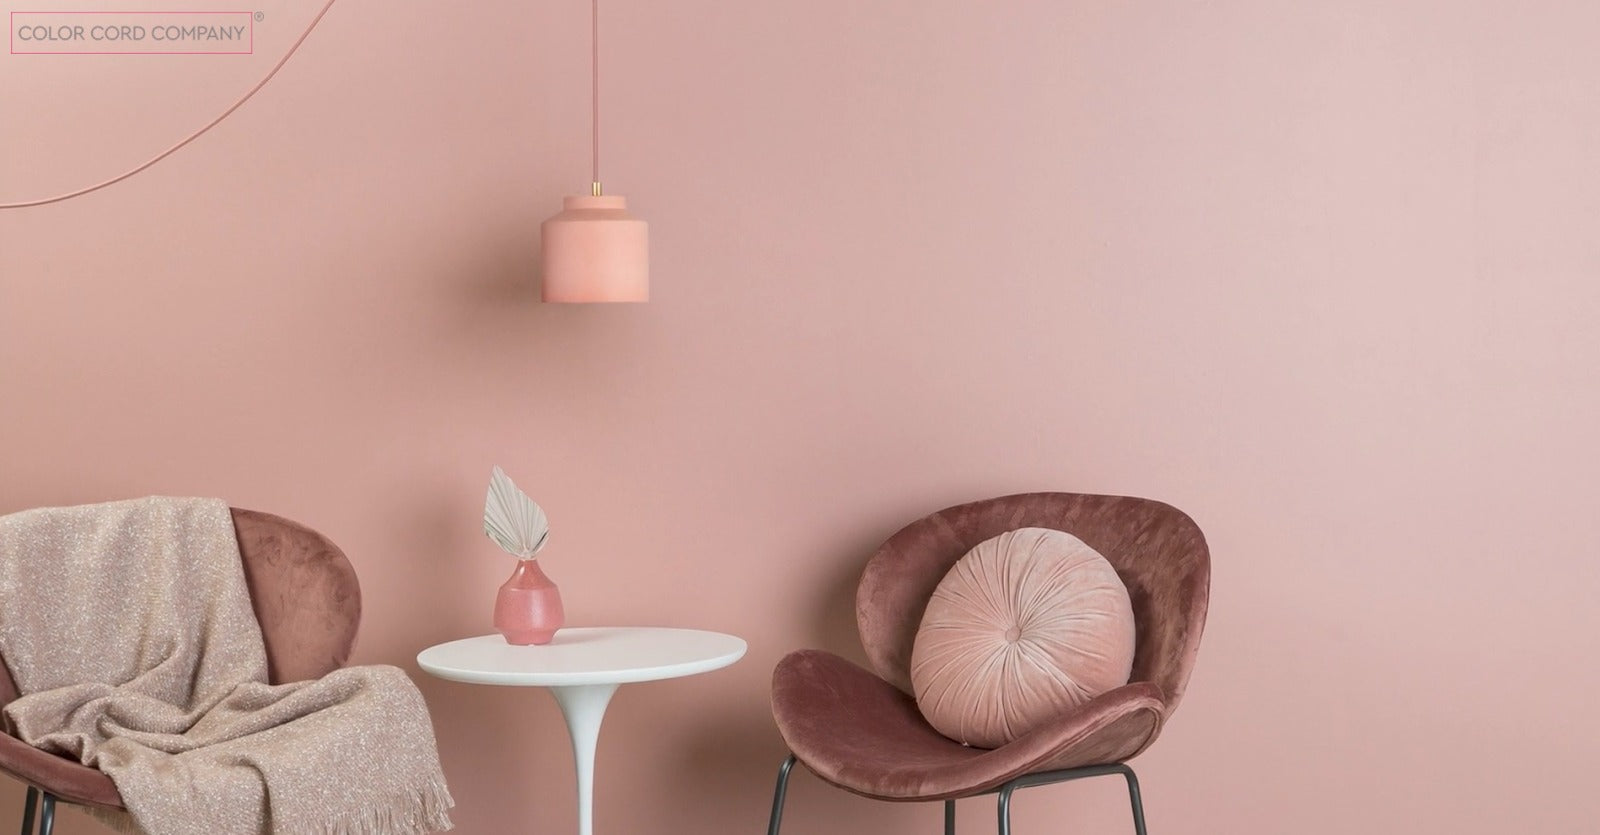
Brian ObernesserHave you ever wanted to bring a more organic feel into your home decor? Well, clay pots are a great place to start. Discover how a terracotta pot with warm, pinkish tones can help transform your space — along with a few extra earthy accessories.
In this How-To DIY lighting tutorial, we’ll show you how to turn a clay pot into a pendant light fixture using our hardware kit, basic socket, and a ready-to-wire plug in pendant whip.
Watch the video and follow our written instructions below for a beautiful clay light fixture that will help your lighting decor feel more uniquely… you!
Materials
In addition to the lighting fixture accessories, we recommend a few tools to ensure you can get the job done right. Check out the necessities for this clay light fixture project here:
- Power Cord Whip (Color & Length of Your Choice)
- 1/8 IPS Fixed Shade Cord Hardware Kit
- Basic Ivory Socket
- Clay Pot (Color & Size of Your Choice)
- Swag Hook
- Light Bulb
- Phillips-head Screwdriver
- Flathead Screwdriver
- Needle Nose Pliers
When it comes to the cord, pot, and hardware of your clay light fixture, you can customize this to fit in with your aesthetic. Whether you found the perfect painted terracotta pot and you want to pair it with our Polished Copper hardware finish and rose gold cord whip, or you prefer a black on black on black vision, we have every color and finish you could possibly need to make it happen.
Explore our cord whip selection and hardware kit options to find the perfect color combination to meet your needs. We recommend choosing the three-prong cord whip, available in over 35 colors, as well as the fixed shade cord hardware kit, available in six unique finishes.
Instructions
Putting together all the components of this clay light fixture may seem simple, but we recommend you watch our video a few times and read our instructions so you don’t miss a thing! In addition to the guidance we provide here, you’ll also find that our hardware kit includes some brief explanations and wiring instructions for a little extra support.
- Grab the female barrel cord grip, loosen the set screw, and feed it over the exposed ends of your power cord whip.
- Next, feed the knurled nut, metal washer, and one silicone washer over the cord whip so they end up sitting on the outside top of the pot.
- Feed the exposed ends of the power cord through the hole at the bottom of the pot. If you bought a pot without a hole, you’ll need to drill one.
- Now apply the second silicone washer and feed it onto the cord so that it sits inside the overturned pot to ensure the hardware pieces sandwich the pot and secure it in place.
- Grab the socket cap and find the smaller set screw on the inside of the cap. Loosen it a little bit.
- Thread the 1” all-thread to the top of the socket cap and tighten the smaller set screw back down so the all-thread is completely secure.
- Now loosen the large ground set screw and feed the cap and all-thread onto the end of the power whip with the exposed wires.
- Slip the green ground wire into the hole where you’ve just loosened the larger ground screw. Tighten the screw back down to secure the wire.
- Grab the socket body and locate the prongs on the inside of it to identify the positive and negative locations.
- The black positive goes into the long prong, and the white negative wire goes into the short prong.
- Flip the socket body over and fit your black and white wires into their corresponding positive and negative holes.
- Once in place, tug on the wires lightly to make sure they’re completely secure before moving on to the next step.
- Snap the socket body onto the cap, and your clay light fixture is now fully wired. Once snapped into place, you will not be able to separate the two pieces again.
- Feed the cord and the socket up into the inside of the pot to sit the socket flush against the silicone ring.
- On the outside of the pot, slide down the silicone and metal washer so they sit on the all-thread directly on top of the pot.
- Next, thread the knurled nut and the female barrel cord grip onto the all-thread to ensure all pieces are snug and flush against both sides of the pot.
- Finally, tighten the set screw back down on the cord grip, and you’re all done!
The last few steps involve screwing a light bulb into the clay light fixture, attaching your swag hook to the ceiling, hanging the fixture, and plugging it in. Explore all our lighting accessories to guarantee you have everything you need to customize this light fixture to your personal specifications.
Final Touches

When it comes to light bulbs and swag hooks, you also have a ton of options to ensure you’re customizing every aspect of your clay light fixture. Check out incandescent and LED bulbs, as well as Edison-style bulbs or oversized designs. Just make sure the bulb base is designed to be compatible with the socket listed in our tutorial.
Once you’re done with bulb selection, you can start exploring our swag hook options. We currently offer several styles that vary in look and function. No matter which style you choose, you’ll find that we offer a variety of finishes to ensure that your swag hook also matches the rest of your clay light fixture hardware.
Feeling Inspired?
If you’re feeling inspired and want to explore a few other DIY tutorials, our blog is full of inspiration, instructions, and support. Check out tutorials for desk lamps, floor lamps, pendant lights, and so much more!
Just finished your project? Share it with us when you tag Color Cord Company in your social media posts. You might just be featured on our social media and website!
Have any questions about this clay light fixture tutorial? Our team is always here to help. Feel free to reach out to us at info@colorcord.com if you have any concerns to get the personalized guidance you need.
Thanks for watching!