
How to Build a Wood Bead Pendant Light
Beau WynjaAt Color Cord Company, we do love DIY crafts – especially with wood. If you’re wondering how to fill up your holiday free time, we have an idea that could be perfect for sprucing up your lighting decor, bonding with your kids, and stretching those creative muscles: a wood bead pendant light!
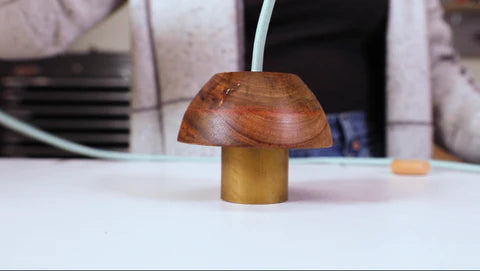
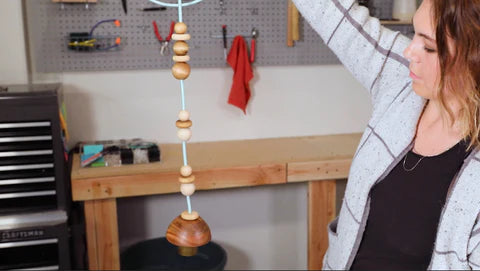
For this wood bead ceiling light project, we’ve incorporated wooden beads of various shapes and sizes along your cloth-covered lamp cord to emphasize a Raw Brass Single Port Ceiling Pendant! But you can do this with any chandelier, plug-in, or pendant light you have in your home, or even when designing your light from scratch in our customization station!
Now follow along as we take you step-by-step through creating this plug-in wood bead chandelier
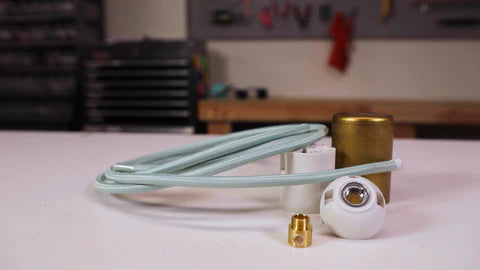
Tools & Materials for the Wood Bead Pendant Light
- Cloth Covered Electrical Cord
- Basic Ivory Socket
- Flat Top Metal Socket Cover
- Male Metal Barrel Cord Grip
- LED Bulb
- Single Port Ceiling Canopy
Some other tools and accessories you should have on hand include wooden beads and a bowl of your choice, drill, wood stain, wire stripping tool, electrical tape, screwdriver, and pliers.
Assembly Process for the Wood Bead Ceiling Light
Step 1: Drilling Into the Beads and Bowl
Step 3: Wiring your Single Port Ceiling Pendant
Step 4: Threading the Wood Components
Step 1: Drilling Into the Beads and Bowl
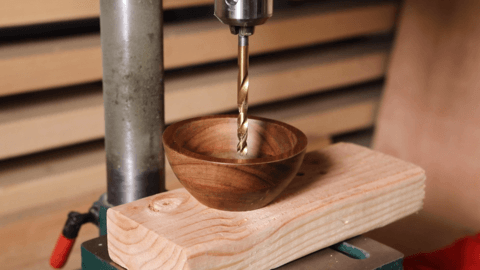

The holes in our beads were a touch too small to fit over our 18g Cloth Covered Electrical Cord, so we drilled the holes a bit larger. We also used the same drill to create a hole in the wooden bowl. If you shop for beads and bowls that already have large enough holes for your wood bead pendant light, you can skip this step.
Step 2: Staining

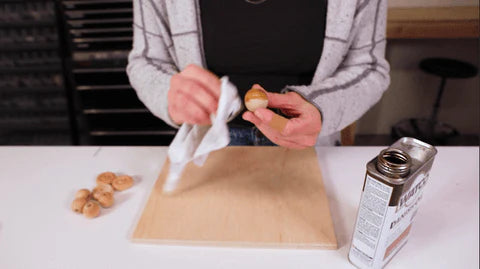

Because our beads were unfinished, we could customize our strain color. Our team decided on a Dark Walnut finish to provide a subtle contrast between the wood and the Raw Brass components. You can buy your wood components already stained in the color of your choice, or customize them with your preferred stain shade.
Step 3: Wiring your Single Port Ceiling Pendant
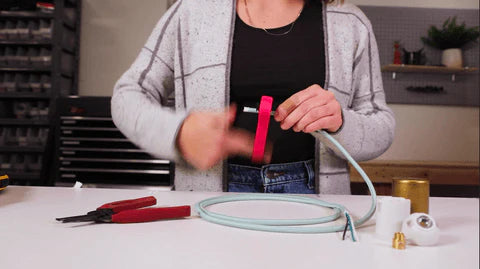
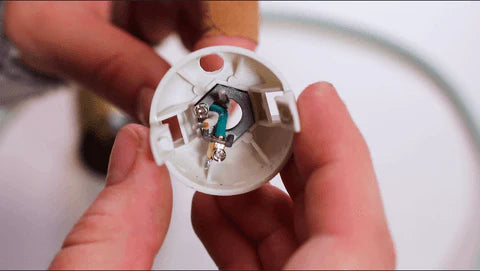
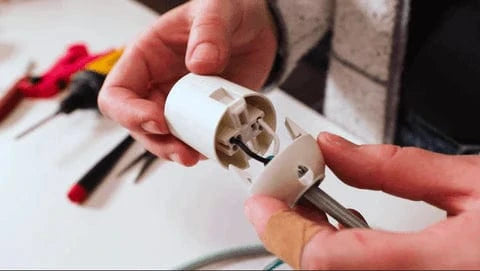
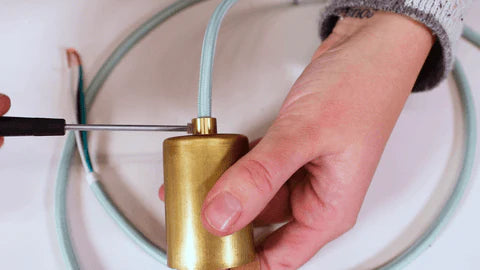
We don’t want to review every step of the wiring instructions here, but you can see some of the basic steps in the images above, and find them written out in our How To Wire a Basic Ivory Socket video.
Now, let's make it a BALLER plug-in wood bead chandelier!
Step 4: Threading the Wood Components
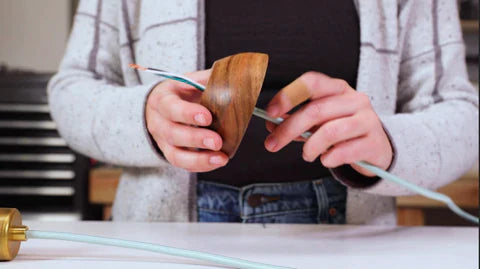
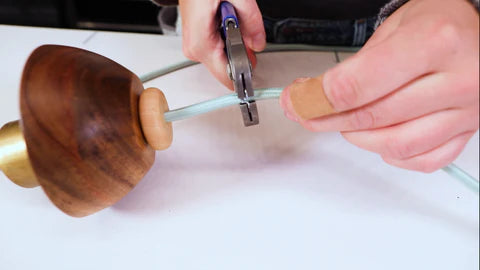

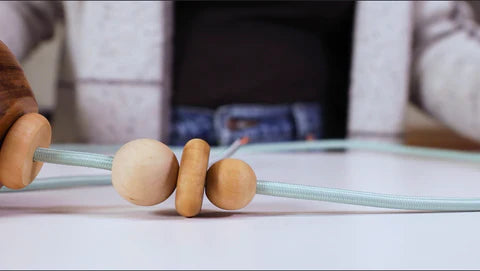
This is the part where you can really let your creativity shine. Space the beads in any order and design you want along the length of the cord. We used crimps along the cord as stoppers to ensure each bead was in the right spot. We also combined stained and unstained beads for a little more natural variation and contrast in the final look.
More Ideas at Color Cord Company

Did our guide for a wood bead pendant light inspire you to create something new? Send us photos of your DIY Holiday Projects to be featured in our posts!
And don’t forget to stay tuned to our blog, as the next project is coming up!